
Introduction
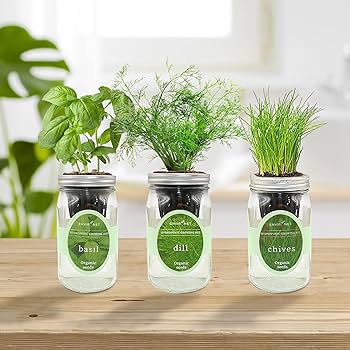
Creating a Mason Jar Herb Garden is a simple and rewarding way to grow fresh herbs right in your kitchen. Whether you have limited space or want to add a touch of greenery, using mason jars as planters offers a charming, cost-effective, and eco-friendly solution. This article explores how to set up and maintain a thriving herb garden using mason jars, providing practical tips, care instructions, and expert advice for gardeners of all levels.
Why Choose a Mason Jar Herb Garden?
Space-Saving and Stylish
Mason jars are compact, making them ideal for small apartments or windowsills. Their clear glass allows you to monitor soil moisture and root health easily. Plus, they add a rustic, decorative touch to your home.
Cost-Effective and Sustainable
Reusing mason jars reduces waste and saves money compared to buying traditional pots. They are durable and versatile, suitable for various herbs.
Fresh Herbs Year-Round
Growing herbs indoors means you have fresh ingredients at your fingertips regardless of season, enhancing your cooking with vibrant flavors and aromas.
Getting Started: What You Need for Your Mason Jar Herb Garden
- Mason jars (preferably 16 oz or larger)
- Herb seeds or starter plants such as basil, parsley, thyme, or mint
- Quality potting soil formulated for herbs
- Small pebbles or activated charcoal for drainage
- Watering can or spray bottle
- A sunny windowsill or grow light
Step-by-Step Guide to Planting Your Mason Jar Herb Garden
1. Prepare Your Mason Jars
Begin by cleaning your jars thoroughly. Add a 1-inch layer of small pebbles or activated charcoal at the bottom to prevent waterlogging and root rot.
2. Add Potting Soil
Fill the jars with herb-specific potting soil, leaving about an inch of space at the top to avoid overfilling.
3. Plant Your Herbs
Sow seeds according to packet instructions or transplant starter plants gently. Firm the soil lightly around the roots.
4. Water Wisely
Water the soil just enough to moisten it. Be cautious not to overwater, as mason jars lack drainage holes.
5. Position for Optimal Light
Place your jars on a sunny windowsill with at least 6 hours of indirect sunlight daily. Consider supplemental grow lights if natural light is insufficient.
Caring for Your Mason Jar Herb Garden
Light Requirements
Most herbs thrive with 6-8 hours of light. Rotate jars occasionally to ensure even growth.
Watering Tips
Check soil moisture regularly by touching the top inch. Water when dry, but avoid soggy soil to prevent mold and root rot.
Feeding and Pruning
Use a diluted, balanced liquid fertilizer every 4-6 weeks. Regularly pinch off leaves to encourage bushier growth and prevent flowering, which can reduce herb flavor.
Troubleshooting Common Issues
- Yellowing leaves: Often a sign of overwatering or poor drainage.
- Leggy growth: Indicates insufficient light; move jars closer to light sources.
- Pests: Watch for aphids or spider mites; treat with mild insecticidal soap or neem oil.
Expert Insights
According to horticulturist Dr. Emily Green, “Mason jar herb gardens are excellent for beginners because they combine simplicity and functionality. The key to success lies in balancing moisture and light.” Studies show that herbs grown indoors can retain up to 40% more essential oils, enhancing flavor and aroma compared to store-bought counterparts.
Conclusion
A Mason Jar Herb Garden is an accessible and enjoyable project that brings fresh herbs and greenery into your home. By selecting the right herbs, providing adequate light and water, and maintaining proper care, you can enjoy the benefits of homegrown flavors year-round. Start your mason jar garden today and discover the satisfaction of nurturing your own fresh herbs in a stylish, sustainable way.