Introduction
Starting a garden on new ground can be both exciting and challenging. Preparing new ground for a garden is a crucial step that determines the health and productivity of your plants. Proper soil preparation improves drainage, nutrient availability, and root growth, giving your garden the best chance to thrive. This article will guide you through expert-approved steps to prepare new ground, covering soil testing, clearing, conditioning, and planting strategies. Whether you are a beginner or an experienced gardener, these insights ensure your garden starts on the right foot.
Why Proper Ground Preparation Matters
Before planting, understanding the condition of your soil and environment is essential. Preparing new garden ground:
- Enhances soil structure for better aeration and water retention.
- Reduces weed competition by removing unwanted plants.
- Balances soil nutrients through amendments.
- Creates an optimal environment for seed germination and root development.
Skipping these steps can lead to poor plant growth, increased pest problems, and wasted effort.
Assessing and Testing Your Soil
Conduct a Soil Test
Testing your soil composition and pH is the first expert step. You can purchase a DIY kit or send samples to a local extension service. Key aspects to test include:
- pH level: Ideal garden soil pH is generally between 6.0 and 7.0.
- Nutrient content: Levels of nitrogen (N), phosphorus (P), and potassium (K).
- Soil texture: Clay, sand, or loam balance affects drainage.
Interpret Test Results
Based on results, you can decide on soil amendments:
- Add lime to raise pH if soil is acidic.
- Use sulfur to lower pH if soil is alkaline.
- Incorporate organic matter to improve texture and nutrient content.
Clearing and Preparing the Site
Remove Existing Vegetation and Debris
Start by clearing the area of grass, weeds, rocks, and debris. This reduces root competition and prevents pests. For persistent weeds, consider solarization—covering the soil with clear plastic for 4–6 weeks to kill seeds.
Loosen the Soil
Use a spade, garden fork, or rototiller to break up compacted soil to a depth of at least 12 inches (30 cm). This step improves aeration and allows roots to penetrate deeply.
Level and Shape the Ground
Ensure your garden bed has proper drainage by leveling the soil or creating raised beds. Slightly mounding beds can prevent waterlogging, especially in clay-heavy soils.
Conditioning the Soil for Optimal Growth
Incorporate Organic Matter
Add compost, well-rotted manure, or leaf mold to enrich the soil. Organic material improves moisture retention and provides nutrients.
Apply Fertilizers and Amendments
Based on soil test recommendations, mix in balanced fertilizers or specific nutrients to correct deficiencies.
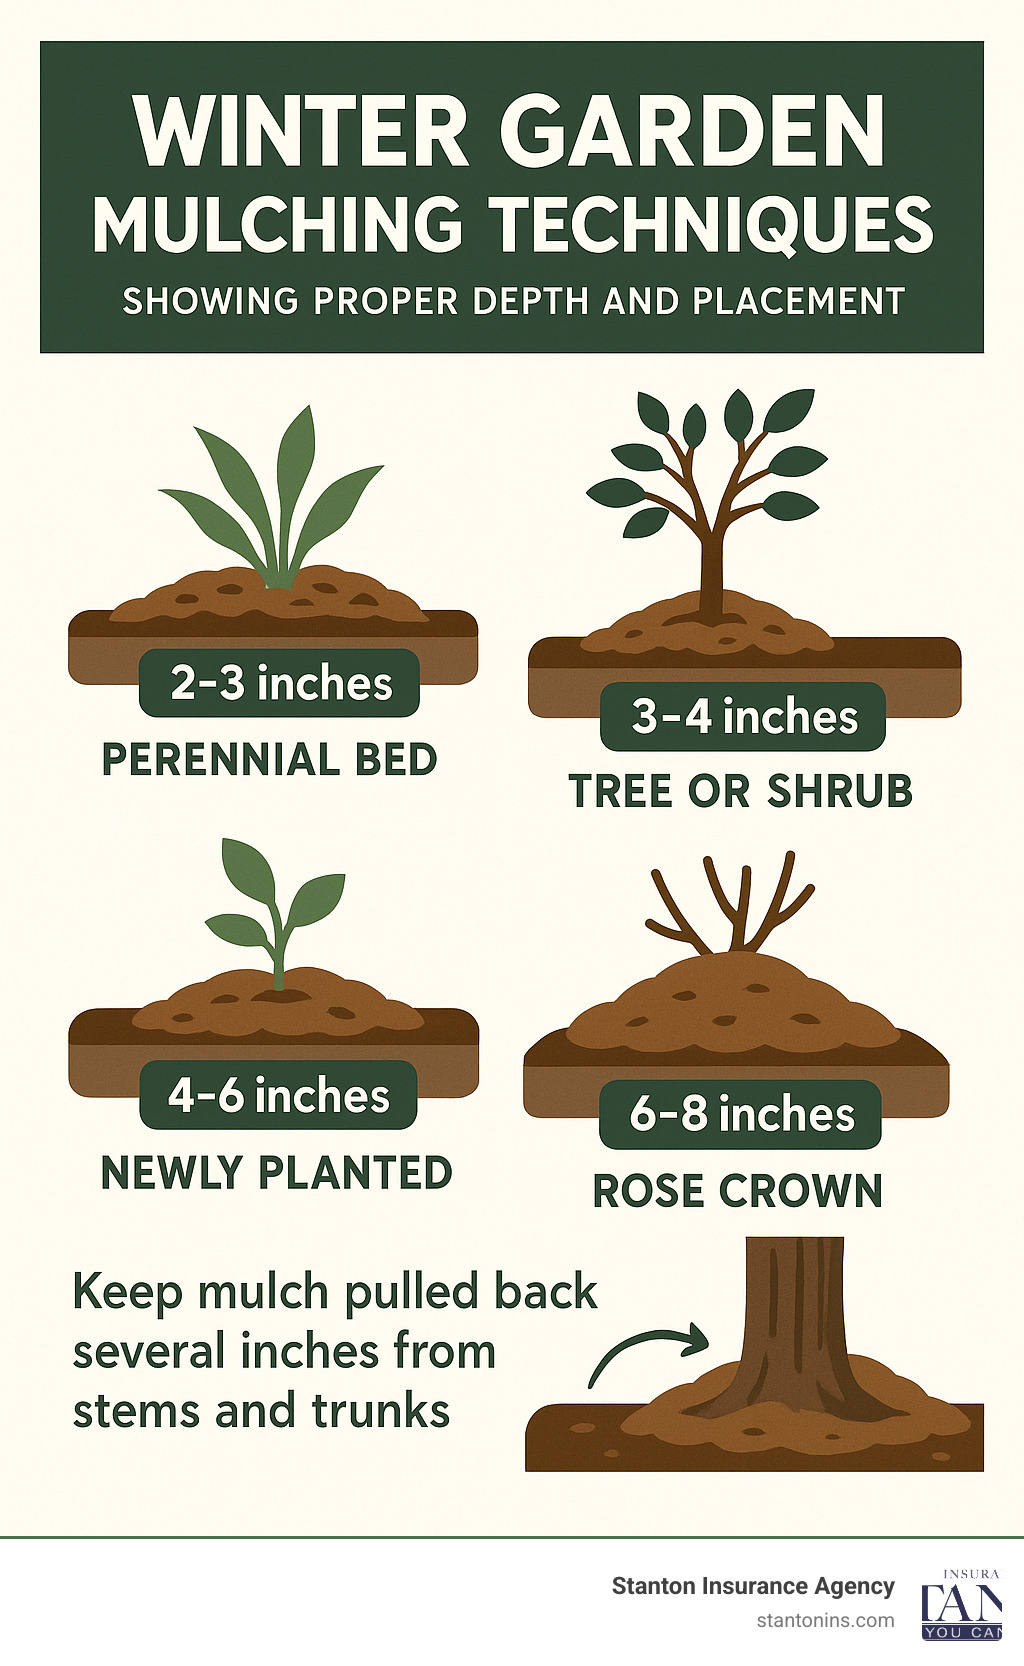
Mulching
After planting, applying mulch helps retain moisture, regulate soil temperature, and suppress weeds.
Planting on Newly Prepared Ground
Choose Appropriate Plants
Select plants suited to your soil type and climate for better success.
Follow Planting Guidelines
Ensure proper spacing and planting depth to promote healthy growth.
Watering and Maintenance
Water newly planted areas thoroughly and monitor soil moisture regularly during establishment.
Conclusion
Preparing new ground for a garden is a vital process that sets the foundation for a lush, productive garden. By testing your soil, clearing and loosening the ground, enriching it with organic matter, and following proper planting practices, you empower your garden to flourish. Remember, well-prepared soil not only supports healthy plants but also reduces long-term maintenance efforts. Start your garden right today and enjoy the rewards of a thriving green space!